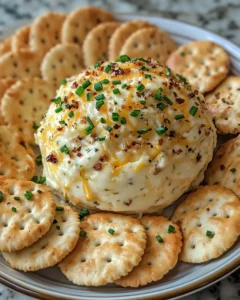
There’s something special about gathering around a table filled with simple yet elegant appetizers—especially when one dish becomes the star of the show. The Garlic Herb Cheese Ball with Crackers is that kind of recipe. Perfect for family get-togethers, holiday celebrations, or casual evenings with friends, this creamy and flavorful cheese ball brings everyone together. It’s a nostalgic classic that never goes out of style, blending smooth cream cheese, savory herbs, and a hint of garlic for an irresistible bite.
Inspired by old-fashioned recipes that graced party tables in the 1970s and 1980s, this updated version delivers all the comforting flavors you remember but with a fresher, modern twist. Whether it’s served at Thanksgiving, Christmas, or a summer cookout, it’s guaranteed to disappear fast. This recipe proves that the simplest ingredients—when mixed with care and creativity—can create something truly unforgettable.
Why You’ll Love This Garlic Herb Cheese Ball
If you’re looking for a crowd-pleasing appetizer that takes minimal effort but delivers maximum flavor, this cheese ball will quickly become your go-to. Here’s why it deserves a place on your entertaining menu:
-
It’s incredibly easy to make. With just a few simple ingredients and a few minutes of mixing, you’ll have a showstopping appetizer ready to chill and serve.
-
Make-ahead friendly. This cheese ball actually tastes better the next day as the flavors deepen overnight.
-
Customizable to your taste. Add your favorite herbs, spices, or shredded cheese varieties to create your own signature version.
-
Visually stunning. Rolled in fresh herbs and served with an assortment of crackers, it looks like something from a gourmet spread.
-
A flavor everyone loves. The creamy base, bold garlic, and aromatic herbs pair beautifully with salty, crunchy crackers or fresh-cut veggies.
This recipe is proof that entertaining doesn’t have to be complicated to feel special.
Ingredients
For this Garlic Herb Cheese Ball with Crackers, you’ll need a balance of creamy, tangy, and savory ingredients. Each one plays a key role in building flavor and texture.
For the Cheese Ball:
-
16 oz cream cheese, softened
-
1 cup shredded sharp cheddar cheese
-
2 tablespoons unsalted butter, softened
-
2 cloves garlic, minced
-
2 teaspoons fresh lemon juice (optional, for brightness)
-
1 tablespoon chopped fresh parsley
-
1 tablespoon chopped fresh chives
-
1 tablespoon chopped fresh dill
-
½ teaspoon onion powder
-
¼ teaspoon garlic powder
-
¼ teaspoon black pepper
-
⅛ teaspoon salt, or to taste
For Rolling:
-
¼ cup chopped fresh parsley
-
2 tablespoons chopped chives
-
2 tablespoons chopped toasted pecans or walnuts (optional for texture)
For Serving:
-
A variety of crackers (buttery, wheat, or multigrain work best)
-
Fresh vegetable sticks (like celery, cucumber, or bell pepper slices)
Directions
1. Soften the Base
Remove your cream cheese and butter from the refrigerator at least 30 minutes before starting. This ensures they blend smoothly without lumps. Place both in a large mixing bowl and use a hand mixer or wooden spoon to combine them until creamy and fluffy. This step creates the perfect texture for your cheese ball.
2. Add Flavor and Texture
Mix in the shredded cheddar cheese, minced garlic, lemon juice, and seasonings. The combination of garlic, herbs, and cheddar gives the mixture depth and balance. Stir well to make sure every bite is evenly flavored.
At this point, you can taste the mixture and adjust seasoning to your preference—add a bit more garlic powder for extra kick or a sprinkle of dill for more herbaceous flavor.
3. Shape the Cheese Ball
Scoop the mixture onto a large piece of plastic wrap. Use your hands to gently form it into a round ball. The mixture will be soft, so the wrap helps shape it cleanly. Once formed, tightly wrap the ball and refrigerate it for at least 2 hours (or overnight). Chilling allows the flavors to meld and the cheese ball to firm up for easy rolling and slicing.
4. Prepare the Coating
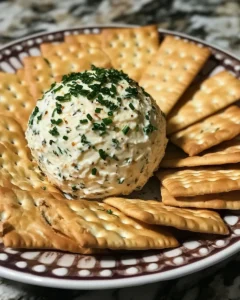
Before serving, combine your coating ingredients—fresh parsley, chives, and, if you’d like, some finely chopped toasted nuts. Spread them evenly on a plate. The herbs create a vibrant green finish that makes the cheese ball look fresh and festive, while nuts add a subtle crunch and nutty aroma.
5. Roll and Finish
Unwrap your chilled cheese ball and roll it gently over the coating mixture, pressing lightly to make sure the herbs and nuts adhere evenly. You can reshape it slightly as needed to perfect the roundness.
6. Serve and Enjoy
Place the finished cheese ball on a serving platter surrounded by crackers and vegetables. For presentation, drizzle a light touch of olive oil over the top or garnish with a small sprig of dill or parsley. Serve immediately, or refrigerate until guests arrive.
Tips for the Perfect Cheese Ball
1. Use High-Quality Cheese
Since cheese is the main ingredient, it’s worth choosing high-quality cream cheese and cheddar. Block cheddar that you shred yourself melts and blends better than pre-shredded versions, which often contain anti-caking agents.
2. Mix Herbs Carefully
Fresh herbs are best for this recipe—they add both flavor and a beautiful aroma. However, if you only have dried herbs, reduce the amount to about one-third (for example, 1 teaspoon dried dill instead of 1 tablespoon fresh).
3. Chill Long Enough
Don’t skip the chilling step! The resting time in the refrigerator helps the cheese ball firm up, making it easier to coat and slice. It also allows the garlic and herbs to infuse deeper into the cream cheese.
4. Prevent Garlic Overload
Raw garlic can be intense if you use too much. Stick to the recommended amount or lightly sauté the garlic before mixing to mellow its bite while keeping its flavor.
5. Serve at the Right Temperature
For the best flavor and texture, take the cheese ball out of the fridge about 15–20 minutes before serving. This allows it to soften slightly and spread more easily on crackers.
Make-Ahead and Storage
One of the best things about this Garlic Herb Cheese Ball is how easy it is to make in advance. Here’s how to plan ahead and store it properly:
-
Make-Ahead: Prepare the cheese ball up to 3 days in advance. Keep it wrapped tightly in plastic wrap and stored in an airtight container in the refrigerator. Roll it in the herb coating just before serving to keep it fresh and vibrant.
-
Leftovers: Store any leftover cheese ball in the fridge for up to 5 days. You can also form small portions and use them as sandwich spreads or mix them into mashed potatoes for extra flavor.
-
Freezing: While not ideal for fresh herbs, the base cheese mixture (without coating) can be frozen for up to a month. Wrap tightly, freeze, and thaw overnight in the fridge before using.
Serving Suggestions
This cheese ball is incredibly versatile—it pairs beautifully with a variety of dippers and sides. Here are a few ways to make your presentation even more appealing:
1. Classic Cracker Platter
Serve it alongside a selection of buttery, crisp crackers such as water crackers, wheat thins, or multigrain crisps. The different textures and salt levels enhance the creamy cheese perfectly.
2. Fresh Vegetables
For a lighter touch, pair the cheese ball with sliced cucumbers, baby carrots, celery sticks, bell pepper strips, or cherry tomatoes. The freshness of the vegetables balances the richness of the cheese.
3. Breadsticks and Toasted Pita Chips
Crunchy breadsticks or pita chips add a satisfying contrast to the soft texture of the cheese ball. You can even make your own by toasting pita bread wedges brushed with olive oil and a pinch of garlic powder.
4. Seasonal Additions
During holidays, add colorful touches like pomegranate seeds or dried cranberries around the platter. For summer gatherings, pair it with fresh cherry tomatoes or roasted red peppers.
Flavor Variations
Once you’ve mastered this recipe, it’s easy to experiment with different flavor profiles. Try one of these creative twists for your next gathering:
-
Smoky Garlic Herb Cheese Ball: Add ½ teaspoon smoked paprika and ¼ cup shredded smoked gouda for a rich, smoky flavor.
-
Cranberry Pecan Cheese Ball: Mix in ¼ cup chopped dried cranberries and ¼ cup pecans before forming the ball. Roll in more nuts for a festive touch.
-
Spicy Jalapeño Herb Cheese Ball: Add 1 finely chopped jalapeño or a pinch of crushed red pepper flakes for heat.
-
Sun-Dried Tomato & Basil Cheese Ball: Stir in 2 tablespoons chopped sun-dried tomatoes and 1 tablespoon fresh basil for a Mediterranean twist.
-
Ranch-Style Cheese Ball: Add 1 tablespoon ranch seasoning mix and 2 tablespoons shredded Monterey Jack for a creamy, zesty flavor.
Each variation keeps the creamy texture you love but introduces exciting new flavors to suit different occasions.
How to Make a Mini Cheese Ball Platter
For a fun, bite-sized presentation, turn this recipe into mini cheese balls. Roll the mixture into 1-inch balls and coat them with chopped herbs or nuts. Place a pretzel stick or toothpick into each for easy serving. Mini cheese balls are perfect for larger gatherings, allowing guests to grab their own without double-dipping.
This option is also great for kids or more casual events, as it makes snacking neat and simple.
Pairing Ideas (Non-Alcoholic)
The rich, garlicky flavor of this cheese ball pairs beautifully with a range of refreshing drinks. Try serving it with:
-
Sparkling water with lemon or lime for a crisp contrast.
-
Apple cider for a cozy, autumnal pairing.
-
Iced herbal tea (like chamomile or mint) for a soothing touch.
-
Lemonade or citrus spritzers for a bright and tangy balance.
These drinks enhance the herbs and garlic without overpowering the dish.
Perfect Occasions for a Garlic Herb Cheese Ball
This appetizer fits almost any setting, from cozy indoor gatherings to outdoor celebrations. Here are a few perfect times to serve it:
-
Holiday parties: The festive green coating makes it an elegant addition to any table.
-
Family movie nights: Pair it with crackers and fruit for an easy, crowd-pleasing snack.
-
Game day spreads: Serve it alongside chips, dips, and finger foods.
-
Picnics or potlucks: It travels well and can be made the day before.
-
Birthday celebrations: A unique addition to a savory snack table.
Whenever you serve it, you can count on guests asking for the recipe.
Frequently Asked Questions (FAQ)
1. How far in advance can I make the Garlic Herb Cheese Ball?
You can make the cheese ball up to three days in advance. In fact, it often tastes better when made ahead since the flavors have more time to blend. Simply shape the ball, wrap it tightly in plastic wrap, and store it in the refrigerator. For the freshest presentation, roll it in the herb coating right before serving so it looks vibrant and appetizing.
2. What are the best crackers or dippers to serve with it?
This cheese ball pairs wonderfully with a variety of crackers, breads, and vegetables. Buttery crackers like Ritz or multigrain varieties complement the creamy texture, while sturdy options such as pretzel crisps or toasted baguette slices provide satisfying crunch. For a lighter option, serve it with fresh-cut vegetables—celery sticks, cucumber rounds, and bell pepper slices are excellent choices.
3. Can I make this recipe without nuts or dairy?
Absolutely. If you want to skip nuts, simply roll the cheese ball in fresh herbs only for a nut-free version that’s still full of flavor. To make it dairy-free, use plant-based cream cheese and vegan cheddar-style shreds. The texture and flavor will still be delicious, though slightly softer, so chill it well before serving.
4. How do I store leftovers and can I freeze the cheese ball?
Leftovers should be wrapped tightly in plastic wrap or stored in an airtight container in the refrigerator for up to five days. You can also freeze the uncoated cheese mixture for up to one month. When ready to serve, thaw it overnight in the fridge, reshape it, and roll it in fresh herbs or nuts just before presenting. This keeps the coating crisp and flavorful.
Print
Garlic Herb Cheese Ball with Crackers Recipe
- Total Time: 2 hours 15 minutes (including chilling time)
- Yield: 10–12 servings 1x
Description
A creamy, flavorful, and elegant appetizer perfect for holidays, parties, or casual gatherings. This Garlic Herb Cheese Ball combines smooth cream cheese, sharp cheddar, fresh herbs, and a touch of garlic, creating a rich and savory dip that pairs beautifully with crackers or fresh vegetables. Easy to make ahead and guaranteed to impress any crowd.
Ingredients
-
16 oz cream cheese, softened
-
1 cup shredded sharp cheddar cheese
-
2 tablespoons unsalted butter, softened
-
2 cloves garlic, minced
-
2 teaspoons lemon juice (optional)
-
1 tablespoon chopped fresh parsley
-
1 tablespoon chopped fresh chives
-
1 tablespoon chopped fresh dill
-
½ teaspoon onion powder
-
¼ teaspoon garlic powder
-
¼ teaspoon black pepper
-
⅛ teaspoon salt, or to taste
For Coating:
-
¼ cup chopped fresh parsley
-
2 tablespoons chopped fresh chives
-
2 tablespoons chopped toasted pecans or walnuts (optional)
For Serving:
-
Crackers (buttery, wheat, or multigrain)
-
Fresh vegetables (celery, cucumber, or bell pepper slices)
Instructions
-
In a large bowl, beat the softened cream cheese and butter until smooth and creamy.
-
Add the shredded cheddar cheese, minced garlic, lemon juice, parsley, chives, dill, onion powder, garlic powder, black pepper, and salt. Mix well until fully combined.
-
Taste and adjust seasoning as desired.
-
Place the mixture onto a sheet of plastic wrap and shape it into a ball using your hands. Wrap tightly and refrigerate for at least 2 hours or overnight to firm up.
-
Before serving, mix the coating ingredients (parsley, chives, and nuts if using) on a plate.
-
Unwrap the chilled cheese ball and roll it gently in the coating until evenly covered.
-
Transfer to a serving platter and serve with crackers and fresh vegetables.
Notes
-
For a nut-free version, roll the cheese ball in herbs only.
-
To make it dairy-free, use plant-based cream cheese and vegan cheddar.
-
The cheese ball can be made up to 3 days in advance; add the coating just before serving.
-
Store leftovers in the refrigerator for up to 5 days or freeze the uncoated cheese mixture for up to 1 month.
- Prep Time: 15 minutes
- Cook Time: 0 minutes